Set up Claude
Add Charming to Claude as a custom MCP connector, screen by screen.
Add Charming from Claude’s connector settings. The steps are the same on claude.ai and Claude Desktop.
Add the connector
In one click: add Charming to Claude. Claude opens with the name and URL already filled in, so you can skip to approving it. Claude warns about any connector added from a link; check the URL reads https://charm.ing/mcp and continue.
The numbered steps below do the same thing by hand.
-
Copy this URL. Claude needs it for the custom connector.
https://charm.ing/mcp -
Open Claude’s connector settings.
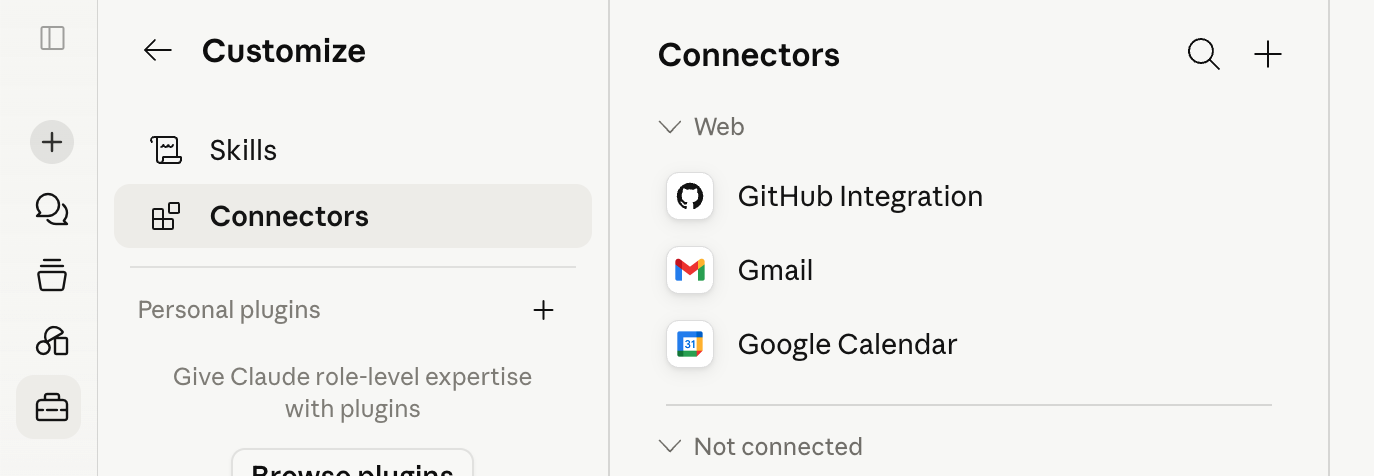
-
Click the plus button, then choose Add custom connector.
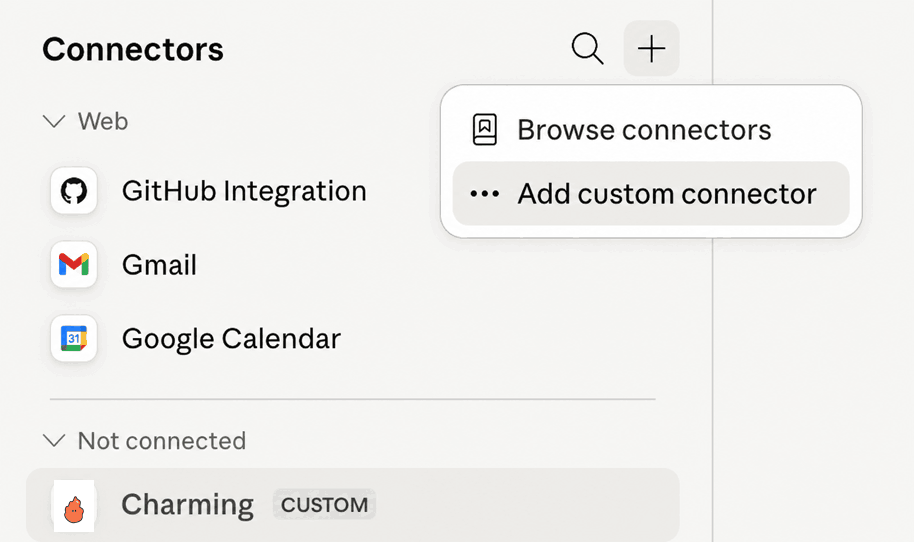
-
Name it Charming, paste
https://charm.ing/mcp, then click Add.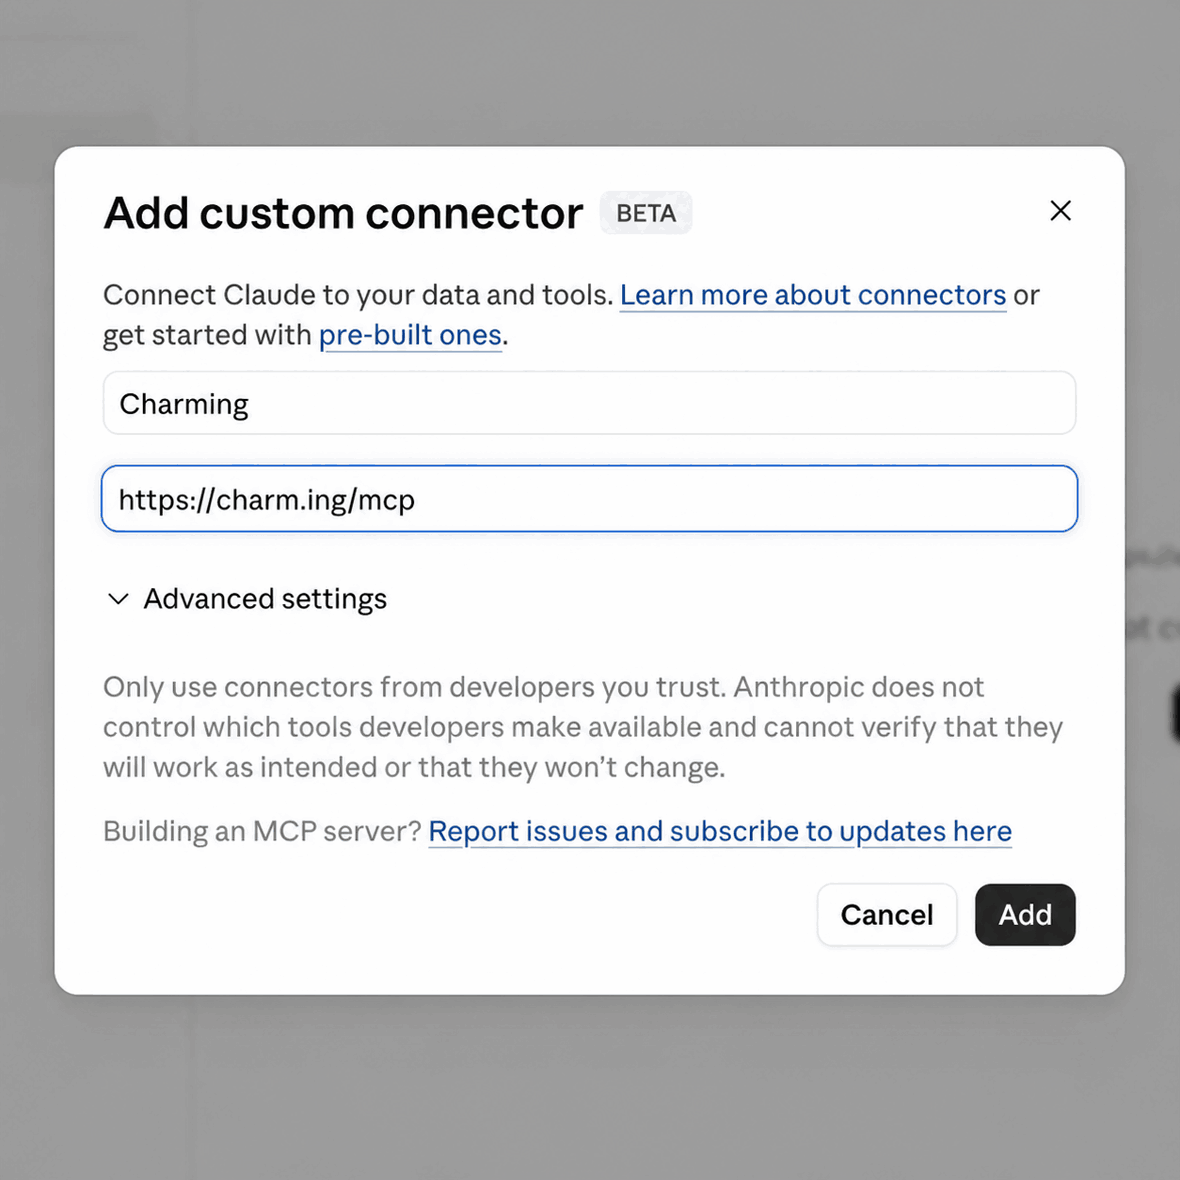
-
Approve the connection. This lets Claude call Charming’s tools.
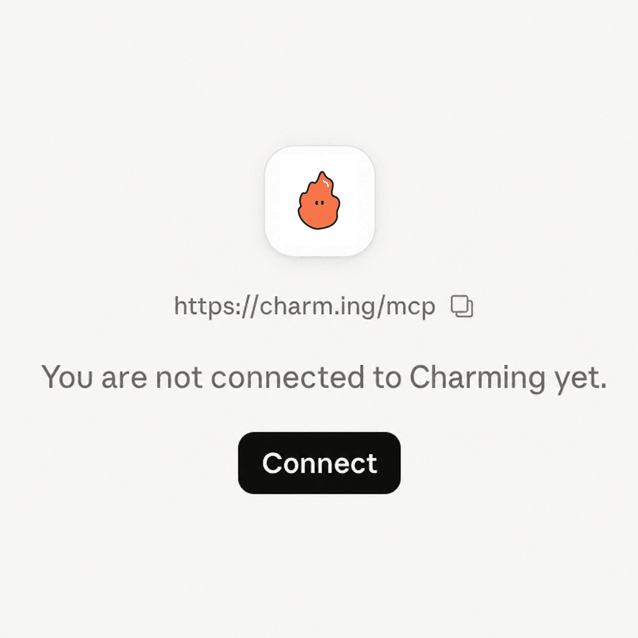
-
Start building. Apps open in claude.ai, Claude Desktop, and the Claude Code desktop app. Claude Code CLI returns a browser link.
See Anthropic’s custom connector guide for plan and workspace controls.
Build without MCP
claude.ai and Claude Desktop cannot make their own web requests, so the connector above is the path there. Claude Code can: it builds through Charming’s HTTP API without any MCP server, which is often the shorter route in a terminal. See Set up Claude Code and Build over the HTTP API, or hand it this:
Connect me to Charming and help me build my first app. Use Charming's
HTTP API. Ask before starting account pairing, wait for me to approve
it, then read https://charm.ing/docs/build-http.md and ask me what I
want to build.
Your agent shows a pairing link and a short code. Open the link, enter the code if asked, and approve the connection. Both paths build the same apps in the same account, so pick one.